Home    PNW-DMR    News    Netwatch    Dash    Repeaters    Talkgroups    c-Bridge    Linking    Open IPSC    MTUSA

Site Map

Conference Connections

How to Create a connection between c-Bridges

A Conference Connection is the method for creating a mapping or pipe 
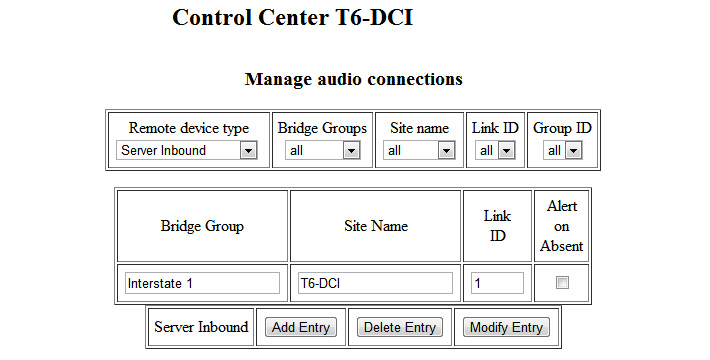
between two c-Bridges.  Server Inbound and Server Outbound connections are the components that are created for use between 2 or more c-Bridges. 

In effect, this is the process that creates the pipe or trunk line that carries that "long distance call" between 2 c-Bridges.  Each end of the pipe is free to bind that trunk to any talkgroup to either timeslot on any of their IPSC Managers or to other c-Bridges.  This is a major advantage of using a c-Bridge over simply peering in on an existing IPSC network when only 1 c-Bridge is available.  The c-Bridge (IPSC-3) is capable of 25 such connections.  
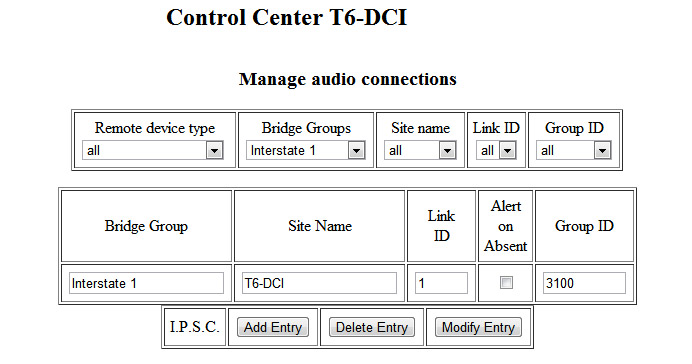
There are 2 methods to bind these Conference Connections, Bridge Groups and Super Groups (DCI's favored approach).

If you wish to join the DCI c-Bridge with a Conference Connection, then the T6-DCI c-Bridge will initiate a Server Outbound connection and you will initiate a Server Inbound connection.  We will provide you our c-Bridge Name (T6-DCI) and a Link ID number.  That is all that is needed to enable the "Mapping" of a pipe from your side of a Conference Connection.  You must provide us with your c-Bridge IP and your Control Center name.  That is it for the connection, it is that simple.
Here's how to bind your your Conference Connections internally so that the CC will actually be pop out onto your c-Bridge IPSC networks and their repeaters.  The example used will create a "Server Inbound" connection on your end make use of the "Bridge" talkgroup (3100).  Simply substitute in your TG name and TG ID if you do not wish to use our name or ID.  Then select your timeslot on which your wish it to appear on your IPSC Manager.  This process consists of 2 steps, the "Binding" of the CC itself and then then your binding of that Bridge Group name to your Talkgroup(s) and your timeslot(s) on your IPSC Manager(s).  You can bind only 1 appearance or all 10 if you wish.
Goto: CONFIG; Audio Connections / Click on "Remote device type", pull down and select Server Inbound as shown in this image on left.

Substitute your Bridge Group (talkgroup or group call) name and timeslot number as well as your Link ID" number to match your IPSC manager's network and timeslot.

1)  In "Bridge Group" enter "Bridge 1".  2)  In "Site Name" enter your c-Bridge name (as shown at top of sample image after Control Center).  3)  In Link ID, enter the IPSC Manager's where you wish your traffic to appear.  4)  In "Group ID" enter the talkgroup ID number 3100.  5)  Do not check the Absent on Alert box.  6)  Select "Add Entry" and then "Go Back" and both your Server Inbound and Talkgroup entries should appear together as shown roughly in the third image.
This example shows how "Server Inbound and Outbound" connections appear in Bridge Groups when bound together and with all 5 IPSC Managers.  It is not an exact sample of the instructions above but is useful to show the relationships when successfully bound.

Now that Super Groups has superseded the "Cross Patches", you can do these bindings there rather than in Bridge Groups.  The advantages are several in that the Scheduler can be used as well as selective use of Talkgroups to control dynamic linking and unlinking of these bindings.  This a more advanced area and best saved for after you have set-up your Bridge Groups and have them working correctly.  Then you can migrate select Talkgroups and Conference Connections once you are comfortable with the concepts of Super Groups.

-

Revised: 07/16/2017 00:37

Webmaster

pgp